


As a follow up to my previous post, 3 Steps to Transforming Learning In Your Classroom, once you’re inspired to try something new in your classroom, and have developed a relevant, real-world task for which your students have an authentic audience, you might be wondering: how do I actually make this work in my classroom?
Making It Work: Structuring Technology-Rich Learning
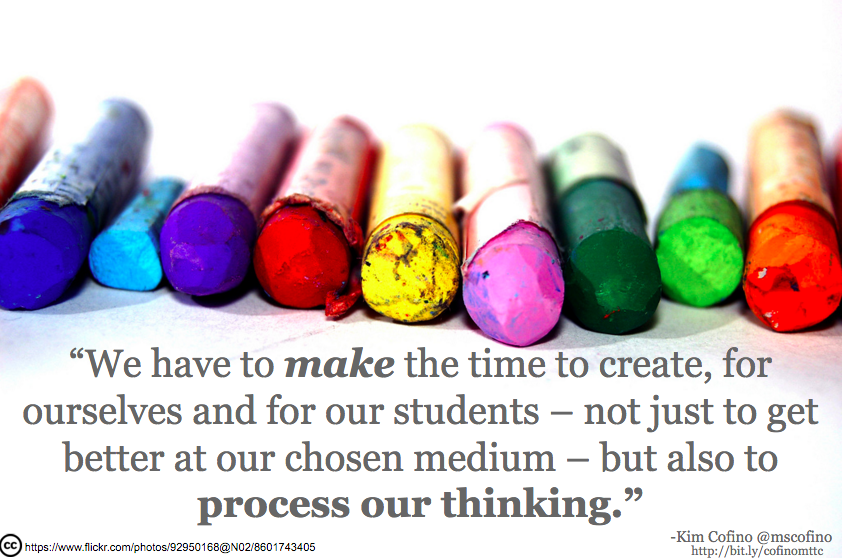
When you’re creating technology-rich learning experiences for students, it can be overwhelming to think about all the different elements you need to tie together: the core content, the new skills you want them to learn (content and tech skills), the time to explore the new tool(s), and, of course, the work it takes actually create this exciting, relevant, real-world task. Along with all of this, you are probably very aware that there is an authentic audience who will actually be seeing the finished product!
The Key: The Design Cycle
After many years of teaching MYP Design, I have found that the design cycle process is the perfect structure to organize your technology-rich learning experiences so that students are well-prepared for the creation of the final product, and they have had plenty of feedback throughout the process to ensure that their work meets the criteria for success. Another great advantage is that this process works with any subject area, and once your students start using it regularly, you’ll notice that they will be able to transfer their skills to other subject areas as well!

A few more reasons I love the design cycle process:
- It really is the natural process that we go through every time we create something – whether it’s dinner tonight, planning a trip, fixing something in our homes, or creating something artistic – these are the essential steps that we go through.
- Life really is just a series of projects, but students are rarely taught how to manage and organize a big project. This process is relevant well beyond the scope of their academic careers.
- The cycle allows you to be a facilitator of learning – as long as you are organized enough in advance, during the majority of the unit you should have plenty of time to conference with students, to provide detailed feedback and to get a very good understanding of what they know and where they need support.
- If you use the “end” of each stage as an opportunity for formative feedback, you are providing a strong scaffolding for success for each student, ensuring that their finished products reflect their best work and meet the success criteria.
- It emphasizes the opportunity for evaluation and reflection – something that can often be left out if we run out of time at the end of a unit. And it doesn’t need to stop there, if you do have more time or another opportunity to review work, you can go back to the beginning of the cycle again and expand and improve on the completed work.
Here’s How It Works:
OK! I think I might have sold you! Here’s how I use this cycle in my classes, and have seen it used in every single subject area – from lower primary through to upper high school.

Side note: before I get into the details of how you may want to structure your unit, I’m going to assume that you’ve already followed the 3 steps in this blog post to make your content relevant to your students, design a real-world task for them to complete, and identified an authentic audience for their work.
The design cycle currently has four stages, and if you’re not in an MYP school, feel free to call them whatever you want – there’s no reason you have to stick to these names just because that’s what they are at the moment (I’ve been teaching in MYP schools since 2000 and the names of each stage have changed several times).
Weaving Together The Three Strands of Learning
As you read through design cycle structure, please note that each stage allows you to thread together the three big elements (or the three strands) of your unit: the content, the type of (or format for the) final product they’re going to create, and the technology tools they’re going to use.

As each stage is described, I’ll include some potential learning opportunities you might want to provide during that stage. This is by no means an exhaustive list, but it should give you an idea of the kinds of experiences you can structure for students. I’ll also note which of the three strands of your unit they highlight – this way you can be sure to include one from each strand.
Keys to Success
Probably the most important part of this process is that you start your unit with the Inquiring and Analyzing stage. There is no pre-teaching or front loading or doing your unit “the old way” and then tacking the design cycle on at the end. The design cycle process is your whole unit – start to finish. And that’s the beauty of the process, it seamlessly merges your core content with the technical (and organizational) skills they need to demonstrate their learning in new and unique ways!
Stage 1: Inquiring and Analyzing
During this stage you’re piquing student interest in the topic and providing time for them to inquire into the main content of this particular unit. The idea here is to get students excited about the final product they are going to create so they start thinking about the content within the context of the actual work you’re asking them to do. At the same time, they will need to be able to explore the new tools you’re asking them to use, and uncover key learning within your core content.
Some learning opportunities could be:
- interacting or experiencing your content through discovery and exploration. This is often a series of activities designed to engage students through an interesting provocation or inquiry. (content)
- conducting research and documenting their findings and thoughts. (content)
- if needed, some of the learning experiences you have used in the past to help students understand the content in this unit. (content)
- exploring a new tool to see how it works (I also recommend that this is documented so they can use it as a personalized help menu when they’re actually creating their finished product). If needed (depending on the age of the student and their experience with the tool), you might also want to identify exactly what skills they need to learn so that you ensure they know how to do everything before they actually get started. (technology)
- exploring quality examples of a finished product to determine what makes a successful piece of work, and documenting their findings and thoughts. I recommend that students note exactly what works (and what doesn’t) as well as identify elements that they would like to include in their finished work. (product/format)
Once students have completed the tasks that work best within your unit, you may want to give them some formative assessment and feedback about the work they’ve done so far. Basically, you’ll want to determine:
- Are they on the right track with your content?
- Have the discovered the key elements of a good finished product?
- Do they have the needed technological skills to be successful in creating their final product?
If they haven’t met those expectations, you could offer them the chance to improve their completed work, or help direct them to improvements within the next stage: Developing Ideas.
Stage 2: Developing Ideas
During this stage, students should have a solid idea of what they are being asked to create because they’ve already seen some inspirational examples and started thinking about what elements will be important in their own work. They also will have a solid foundational understanding of core content because they’ve had time to explore and discover (perhaps through some of the “traditional” activities you’ve done with this unit in the past, or in new ways that may be more relevant to your students’s world today). They should also be feeling relatively confident about what they can do with the technology tools they need to create the final product.

So, now it’s time to get organized. The developing ideas stage helps students solidify the expectations for their finished work, provides structures and timelines for completing tasks, and ensures that they have a documented and clear vision or plan for their finished product.
Some learning opportunities could be:
- drawing or sketching a rough draft of the finished product with annotations so that it’s clear to an outside observer what’s happening. (product)
- breakdown the final product into tasks and creating a timeline for completing each one, in consideration of their schedule, materials, and the need for support. (product)
- writing a script or otherwise documenting the content that will be shared in their final product. (content)
- developing a list of success criteria, based on the research from the Inquiring and Analyzing stage, for their finished work, with a clear rationale for why each element needs to be included. (product and tech)
- reflect on questions that still need answering. Do they have everything they need from the Inquiring and Analyzing stage to demonstrate their learning? (content)
Again, once students have completed the tasks for this stage of the process, you may want to provide formative feedback – especially on the rough draft to ensure that students are still on track. As long as the rough draft is detailed enough, you can usually spot any potential obstacles for student success right now. You’ll want to see:
- Have the understood the content well enough to share / explain / demonstrate it in this new way?
- Have they given themselves enough time to complete the task within deadlines?
- Are they aware of all the material or resources they need to be successful?
- Do they feel confident in the use of the technology tools to be successful in their creation?
If there are any concerns about a student’s readiness to move on, I always give them additional time to improve their work now. This helps ensure their success before they move to the next stage: Creating the Solution.
Stage 3: Creating the Solution
This is when all the inquiring and planning gets put into action. Traditionally, this would also be the longest part of a unit, but if you’ve been following the Design Cycle, you will see that this can actually become the shortest part. Students have already explored and documented all the content they need, they’re organized with a rough draft, script or outline as needed, and they’re confident with the tools they’re going to use. All that needs to happen now is the actual creation.
During this stage I often find that I am 100% in facilitation mode. Students are so well prepared to actually complete their project that they don’t need much from me, aside from check-ins and feedback, and regular deadline reminders. What I love the most about this stage is that usually every student in the room is doing something completely different and I can see all of their hard work come to fruition lesson by lesson.
Although the focus of this stage is independent (or team) work, you may also want to structure some opportunities for feedback before they actually finish, like:
- self and peer reflection / evaluation using the success criteria they defined in the Developing Ideas stage. (product, tech, content)
- individual consultations with each student to see how they’re getting on. (product, tech, content)
Before they actually turn in their finished work, perhaps during individual consultation time, you can also provide some last-minute concrete feedback once you see how their final product is taking shape. You might want to confirm that:
- their final task meets both their success criteria and the assessment criteria for the unit.
- they are on task to finish on time.
- although their tech skills may be strong, sometimes their design / editing / demonstration skills can use a more “mature” perspective – to help them refine their work to focus on the key concepts.
At this point, there usually isn’t too much feedback to share with students because they’ve already done the majority of the thinking work (yet another reason I love the Design Cycle process), but that refinement in presentation is often an issue – this is where I find myself giving the most feedback. Once their work is complete, it’s time to present or share this work with their authentic audience! Often the sharing process can also be combined with the next stage: Evaluating.
Stage 4: Evaluating
This is the part of the design process that we can often end up leaving out. Once the work is “turned in” we can get busy with the next unit or task at hand, and forget about the opportunity for reflection and evaluation. But, as we know, there’s a lot of learning that can happen during evaluation. Ideally the evaluation will happen both within your classroom (from self- and peer-assessments) and with your authentic audience.
Some learning opportunities could be:
- sharing an individually (or team) created feedback survey based on their success criteria, with their authentic audience. (product, tech, content)
- self-reflection of their finished work and how it either meets or does not meet the design specifications they created. (product, tech, content)
- documentation and annotation (of a version of the finished product) of what they would change if they could go through the process again. (product, tech, content)
Once students have had the opportunity to reflect on their finished work, and experience authentic feedback from their audience, you can choose to end the unit or allow them the opportunity to revise and go through the process (although abbreviated) again.
Wrapping it Up
I hope you can see why I appreciate the Design Cycle process so much! It can be a big change in perspective to start a unit with an inquiry, and without pre-teaching or front-loading, but it’s totally worth it! The key is to very clearly identified your learning outcomes so that each of the learning opportunities you include in each stage is guiding students along a path of understanding.

If you give this a try, please let me know what you think! If you’re already experienced at using the design cycle, please share how it works for you!
Learn More: Microcrential Cohorts Starting Soon!
If any (or all of this) sounds interesting to you, please check out our new Eduro Learning microcredentials that launch on September 28th. We have something for every teacher (check out why Microcredentials are so great here):
The Coach: if you’re facilitating or leading conversations like these with teachers, learn how to take the conversation deeper, tackle difficult conversations (like when teachers don’t know what the student learning goals are), and how to lead the development of a vision of technology for learning which prioritizes transformational learning.
The Connected Teacher: if you’re a classroom teacher that wants to connect your classroom to the world, to build in that authentic audience on a regular basis, learn how to build your personal learning network, how to structure global projects, and how to help your students build the digital literacy skills they need to be successful when the world is their audience!
The 1:1 Teacher: if you’re in a 1:1 school and you want to take advantage of all the tech your school has to offer – but still keep the focus on the learning, the content and the curriculum, learn how to design technology-rich units that truly prioritize student learning, while still highlighting new and innovative uses for all of your devices!
Images:
- The Design Cycle, hosted on MYP Design
- Puddle Hurdler by clappstar, CC licensed on Flickr
- Weaving Loom 2 by mike from aus, CC licensed on Flickr
- scaffolding by tuppus, CC licensed on Flickr
- Maker Art by fabola, CC licensed on Flickr
- The Path by th3derek, CC licensed on Flickr
One thought on “Making It Work: Structuring Technology-Rich Learning”